 10955
10955
FCSC 2021 Qualification - ShuffleMe (reverse)
FCSC 2021 Qualification - Shuffle Me
This reverse challenge aimed to make us retrieve an input which will make the program display “Yay!”. The file was an ELF binary for x86_64 arch. I decided to do a write-up for this challenge despite its huge amount of validations (66) in order to see how it’s easy to solve some reverse engineering tasks with Pyning, my personnal binary instrumentation library in python.
Preliminary analysis
Loading the binary in our favorite reverse engineering tool shown only a few casual C functions. The first one to be worthy of interest is main of course.
__int64 __fastcall main(int a1, char **user_input, char **a3)
{
  char stack_buffer_50h; // [rsp+10h] [rbp-60h]
  __int64 v5; // [rsp+60h] [rbp-10h]
  unsigned int userinput_int; // [rsp+6Ch] [rbp-4h]

  if ( a1 != 2 )
  {
    fprintf(stderr, "Usage: %s <secret>\n", *user_input);
    exit(1);
  }
  userinput_int = atoi(user_input[1]);
  memset(&stack_buffer_50h, 0, 0x50uLL);
  __isoc99_scanf("%70s", &stack_buffer_50h);
  v5 = sub_401230((__int64)&stack_buffer_50h, userinput_int);
  if ( v5 == 0x460000 )
    puts("Yay!");
  else
    puts("Nope.");
  return 0LL;
}
It’s important to identify which user input have an direct impact on the program. In the above function we can see that the binary is expecting an integer passed as the first argument but also an input provided through the standard input thanks to scanf.
Our stdin input is placed into the stack were a zero-filled memory space is waiting for it. Then the function sub_401230 is taking both of the user supplied arguments as parameter.
The flow of the program will lets us know if we found the valid key or not depending of the output of the aforementioned function.
__int64 __fastcall sub_401230(__int64 stack_buffer, unsigned __int64 secret)
{
  unsigned __int128 v2; // tt

  *(_QWORD *)&v2 = 0xB5 * secret + 0xD9;
  *((_QWORD *)&v2 + 1) = (0xB5 * (unsigned __int128)secret) >> 0x40;
  return ((__int64 (__fastcall *)(__int64))((char *)sub_40127D + 0x10 * (v2 % 0x200)))(stack_buffer);
}
This function is also quite simple, it first assign 0xb5 * secret * 0xd9 to a 64 bits value in the current stack frame and in a second time (0xB5 * secret) >> 0x40. This value will used to compute an offset which will be the (value % 0x200) * 0x10. Finally this offset is added to the base address of the function sub_40127D, before to be called with our stdin input.
The output of this last call will be forwarded to the main function. To resume, the magic happens in code thats doesn’t belong to regular functions.
Mechanism analysis
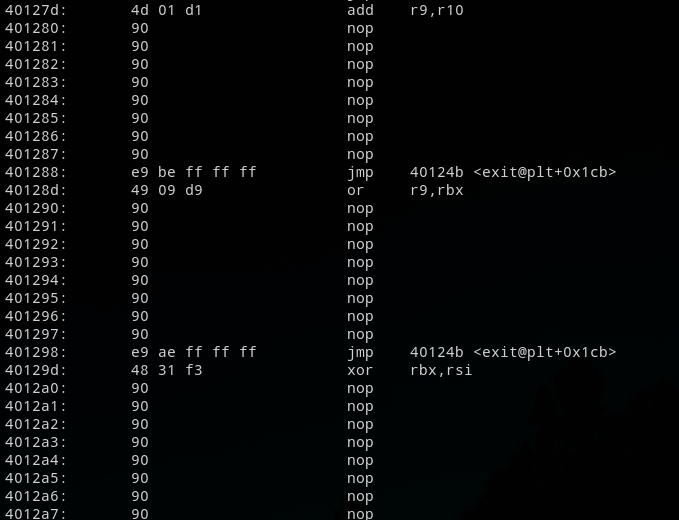
We can look to this non regular code with objdump. It’s quite easy to spot the non conventional code as it has always the same pattern :
- An instruction
- Few nops
- And a finally a jump to
0x40124b
The below figure shows a preview of this code.
The routine at 0x40124b will use the registers states to compute the address to jump to as explained before.
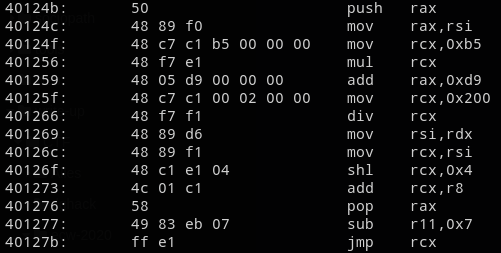
It’s quite simple to understand, given the secret the program jumps in its special routine at the associated offset, then make transformation on our input before to compare it to 0x460000. At this point I got a question, does the binary execute the same amount of instruction depending on the secret ?
The secret of the secret value
To answer this question I have used Pyning, it’s a simple python debugger library which offer some primitives as setting breakpoints, reading or writing in memory.
It also supports single step debugging from a given address, I used this functionality to print the list of the instructions executed with 2 different secrets.
class Reverse:
def __init__(self):
self.bin = "./shuffleMe"
self.dis = Cs(CS_ARCH_X86, CS_MODE_64)
self.dis.detail = True
self.run()
def get_disas(self, addr, display=False):
try:
ins = next(self.dis.disasm(self.text.data[addr - self.text.sh_addr:], addr))
except:
return
colors = {
}
if ins.mnemonic in colors.keys():
if ins.mnemonic in ["jne", "je"]:
print(colors[ins.mnemonic](ins), "ZF 1" if (self.p.regs.eflags & 0x0040) >> 6 == 1 else "ZF 0")
self.get_disas(addr + ins.size, display=True) # we want to see the opposite instruction
self.jmp = True
else:
print(colors[ins.mnemonic](ins))
else:
wanted = ["ebx", "bx", "bl", "esi", "edi", "ebp", "edx", "dx", "dl", "ecx", "cx", "cl"]
if any(a in wanted for a in [ ins.reg_name(ope.value.reg) for ope in ins.operands]):
print(purple(ins))
else:
print(ins)
def do_the_stuff(self, pyning_obj):
if (self.p.regs.rip < 0x410000):
# print(hex(self.p.regs.rip))
self.get_disas(self.p.regs.rip)
def run(self):
self.p = Debug(self.bin, argv=["0"])
self.p.cont()
self.p.breaks(0x401172)
self.p.sendline("test")
self.p.cont()
self.p.si()
self.p.si(callback=self.do_the_stuff, count=-1)
if __name__ == "__main__":
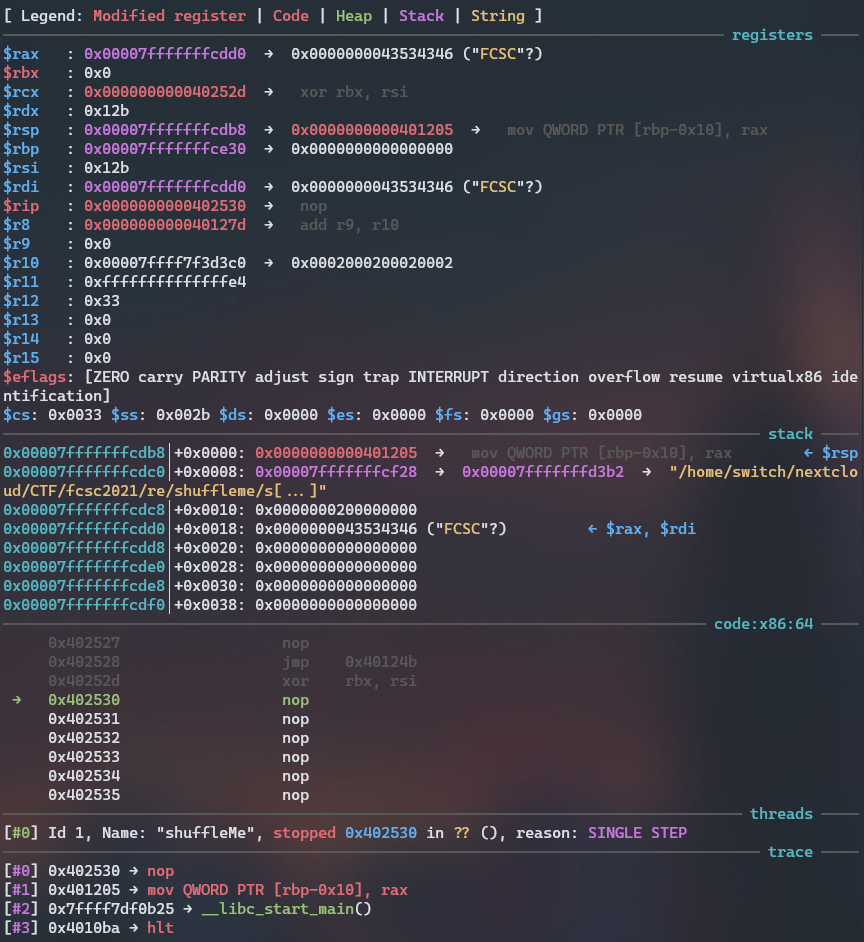
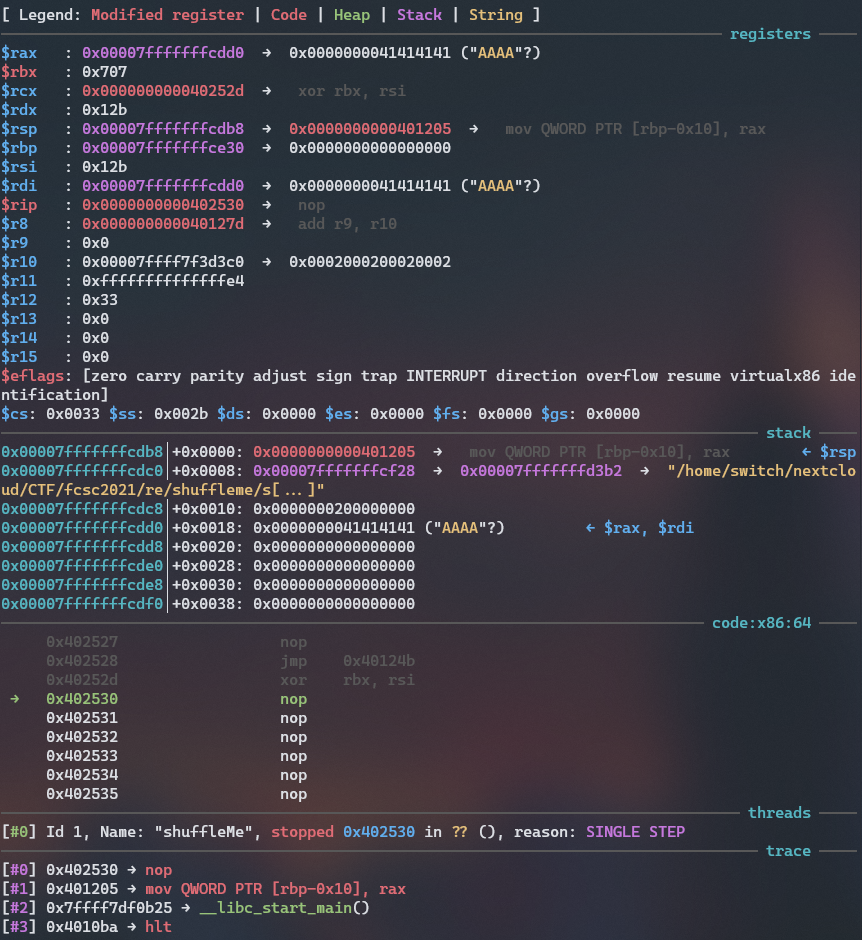
Reverse()Example of output :
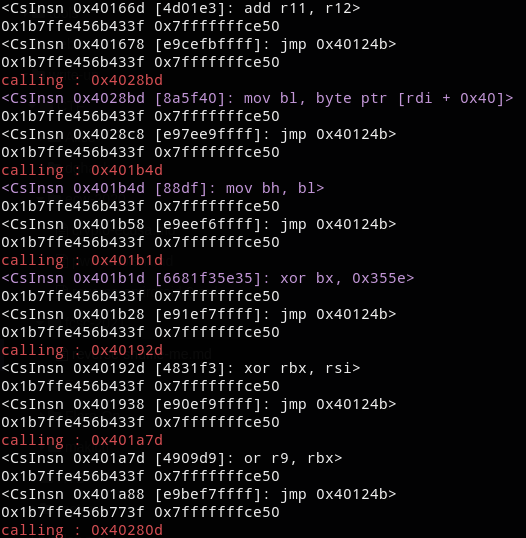
In the above output I have replaced all the nops and the jumps by calling : addr to only display the address hold in rcx before the call to it.
It’s way easier to see which instructions are in fact called. Then I noticed the number of instructions was different between two secrets but in the end both execution will have executed a set of same instruction in the same order.
Knowing this we can deduced that there is a “start” in the unusual code that we must jump in after sub_401230 is called. It’s compulsory as it will execute all the transformation on our input in the right way.
Finding the start instruction
First I noticed a pattern in the executed instructions :
# 1
mov bl, byte ptr [rdi + 0xb]
mov bh, bl
xor bx, 0x64b0
xor rbx, rsi
or r9, rbx
add r9, r10
add r11, r12
# 2
mov bl, byte ptr [rdi + 0xc]
mov bh, bl
xor bx, 0x64e3
xor rbx, rsi
or r9, rbx
add r9, r10
add r11, r12
# 3
mov bl, byte ptr [rdi + 0xd]
mov bh, bl
xor bx, 0x35da
xor rbx, rsi
or r9, rbx
add r9, r10
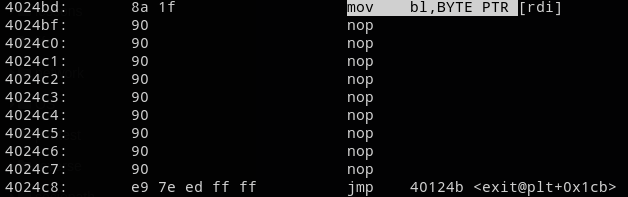
add r11, r12Lost among the nops and jumps it’s now easy to understand how the program uses our input. Especially the instructions mov bl, byte ptr [rdi + offset] thats seems iterate over our input chars. Knowing this we can find the instruction where the offset is 0.
Moreover, looking at the execution made me realize that the comparison are executed in “order”, the offset only being incremented, although the code is showing instruction in a non ordered way.
And here stands our first instruction to be execute 0x4024bd !
So now, how to find the secret, and thus this offset, to jump to this address ? We just have to bruteforce the secret and wait to have this address to show up !
    def calcul_next_jump(self, offset):
        addr = (((offset  * 0xb5) + 0xd9) % 0x200 << 4) + 0x000000000040127d
        offset = (((offset  * 0xb5) + 0xd9) % 0x200)
        return [addr, offset]
I ran the following function in a loop until the returned address was 0x4024bd and it gave me 255. Wen can verify :
In [3]: calcul_next_jump(_, 255)
Out[3]: [4203709, 292]

In [4]: hex(_[0])
Out[4]: '0x4024bd'
Now we can try to understand how the program verify the key.
Letting pyning solve it
While being trying to understand what does this code on my input I noticed that rbx was 0 after the xor rbx, rsi operation if the char was the correct one. It could have been a coincidence but it matched for the FCSC{ value.
And if the char was not correct it will store a value different from zero.
And so we have an oracle to bruteforce easily char by char.
This is here were pyning can show all its power. We simply set a breakpoint after the xor operation and if rbx is 0 we found the correct char.
The only obstacle was to know the address of the xor instruction before executing it in order to set a breakpoint. Hopefully we can calculate the address with only the amount of pattern block we have to execute before reaching the one we want inspect.
    def auto(self, off, nb):
        for i in range(nb):
            addr, off = self.calcul_next_jump(off)
        return [addr, off]

    def calcul_next_jump(self, offset):
        addr = (((offset  * 0xb5) + 0xd9) % 0x200 << 4) + 0x000000000040127d
        offset = (((offset  * 0xb5) + 0xd9) % 0x200)
        return [addr, offset]


    def run(self):
        flag = ""
        j = 4 + 7 * len(flag)

        for i in range(70):
            addr, off = self.auto(255, j)
            print(hex(addr), j)

            for char in printable:

                self.p = Debug(self.bin, argv=["255"])
                self.p.cont()
                self.p.breaks(0x401172)
                self.p.breaks(addr)
                self.p.sendline(flag.encode("utf-8") + char.encode("utf-8"))
                self.p.cont()
                self.p.cont()
                self.p.si()

                if self.p.regs.rbx == 0:
                    flag += char
                    print(flag)
                    print(hex(self.p.regs.rbx), hex(self.p.regs.rip))
                    self.p.kill()
                    j += 7
                    break

                self.p.kill()
For example if we want the xor for the third char of our input.
In [6]: auto(255, 3)
Out[6]: [4200221, 74]

In [7]: hex(_[0])
Out[7]: '0x40171d'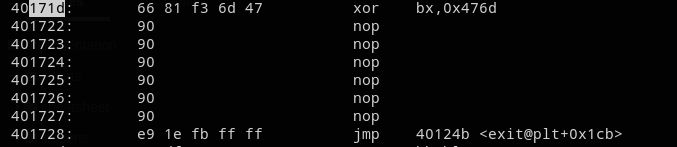
And so we set the breakpoint and just have to check if rbx is 0 ! It’s super easy to do a loop testing all possible printable characters. After few seconds the output will bring us the flag :
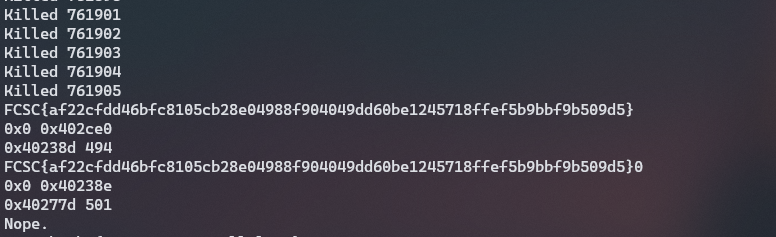
I could have chosen another harder challenge to write-up but I really wanted to show how this library help me to solve easy tasks like this one.
I already used it for quite complex challenges with jump table and opaque predicate. I also used it to solve Malware (3/3) to bruteforce the salt used, letting the whole program do it’s execution and just setting 2 breakpoints to set the datetime and then get the output of the private key password generation function.
Thanks for reading, switch.
PS: Pyning is still in under developpment and so is not present on my github, but I planned to release it ASAP.